Infinite Supernova
“Infinite Supernova is a rhythmic endless runner where the player takes the role of a shooting star outrunning a devastating supernova by dashing and blasting through obstacles.”
Infinite Supernova was developed as part of our Sophomore year GAM200/250 game project at the DigiPen Institute of Technology. I served as a Tools & Graphics Engineer for the lifetime of the project.
The team overcame many challenges throughout the development of this project. I would have never been able to accomplish what I did without the contributions and support from every single person involved in the making of this engine and game, from beginning to end.
While this page will focus on some of the work I contributed, I want to emphasize that there is so much more that the rest of the team accomplished as well.
The Fetch Engine and The Grool Editor
Our team had many team bonding sessions and one of which involved watching ‘Mean Girls’ together, hence the name “Grool” Editor.
Our custom engine was written in C++, and the game was scripted with Lua. We utilized various libraries such as: FMOD, Spine, ImGui, GLAD, GLM, sol2, and cereal. The engine is rendered with OpenGL with shaders written in GLSL.
Debugging
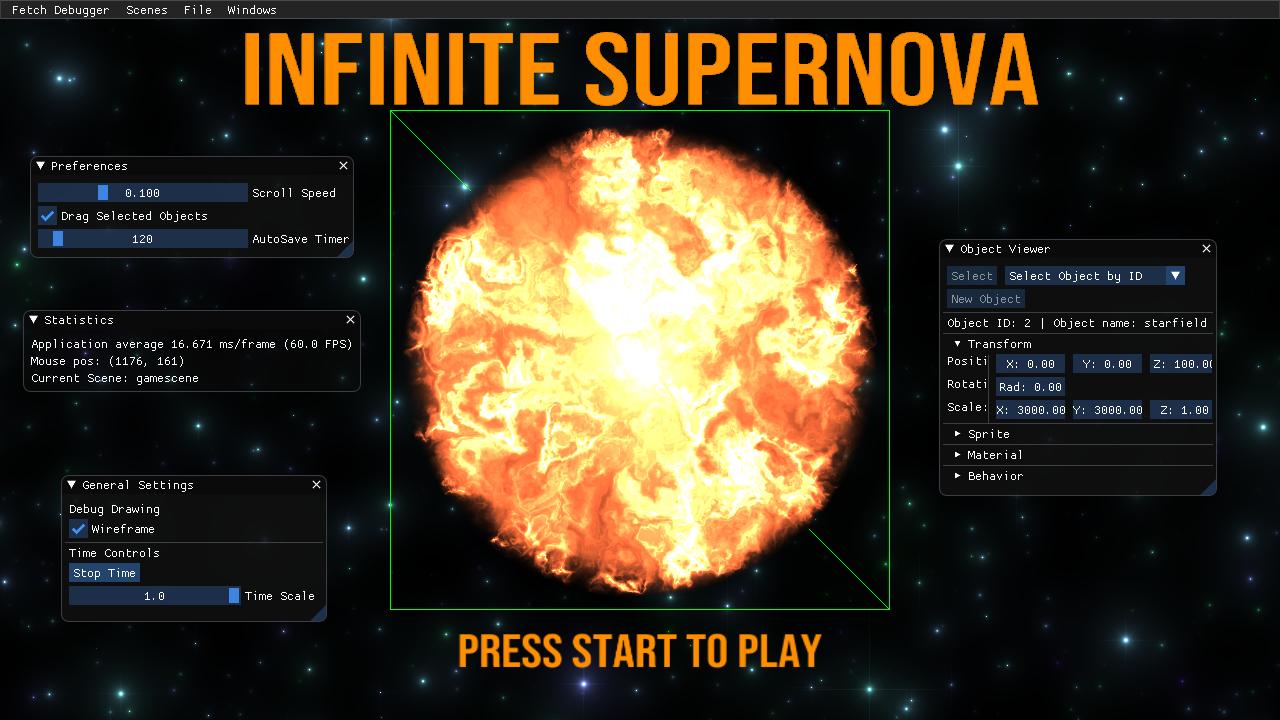
One of the first big tasks I had was to create a way for us to be able to visualize and debug the objects in our engine. We integrated ImGui into the project and worked to expose various data from the engine so that we could view and modify it at runtime.
The Object Viewer was a critical debug window and allowed us to modify the components of our game objects like the Transform and Sprite component. An object in the scene isn’t showing up on screen? Maybe its position is actually a million units away for some reason, or maybe there is a problem rendering the sprite with the current image it has.
The Editor
Given the limited amount of time we had for this project, we wanted to make the editor simple to use and capable of quick iteration. We modeled it after how Unity and Godot handles game creation.
Windows
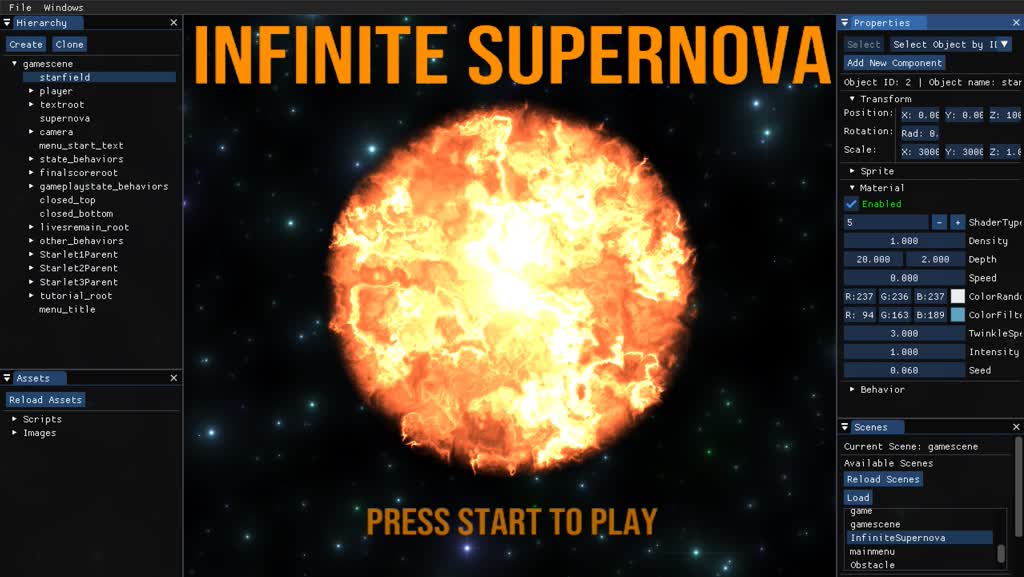
The Hierarchy Window lets us create new game objects and parent them to others. A game object can be selected and edited in the Properties window.
The Properties Window lets us set the data that defines a game object. We can add components such as:
- Physics - Gives the game object the capability to move around in the world using physics.
- Collider - Helps resolve collisions when the Physics component is attached.
- Camera - Gives the object the capability to render the scene from it’s location. Normally this is given to one object, although it is possible to have multiple cameras enabling split screen behavior.
- Sprite - Gives the editor the option to decide what texture image the object is rendered with.
- Material - Extends the functionality of the Sprite component. The sprite can be rendered with different shaders, each capable of having their own unique parameters.
- Text - Text is rendered at the position of the game object. The text can be set in the editor and modified at runtime.
- Particle Emitter - Attaches a particle emitter to the object. The editor is given many options to fully customize the particle emitter’s behavior.
- Behaviors - Lua scripts can be attached to this component. The scripts can be edited and reloaded at runtime allowing quick iteration and bug fixes.
The Assets Window gives us access to the images and Lua scripts we have authored. Images can be dragged and dropped onto Sprite components and Lua scripts can be added to Behavior components.
The Scenes Window allows us to switch to and edit the different scenes that make up our game.
Serialization
We used the cereal serialization library in order to serialize and deserialize our scenes as json files. This gave us the opportunity to easily change certain aspects of our scenes by simply changing the json files, and making source control merging slightly more friendly.
Example Scene
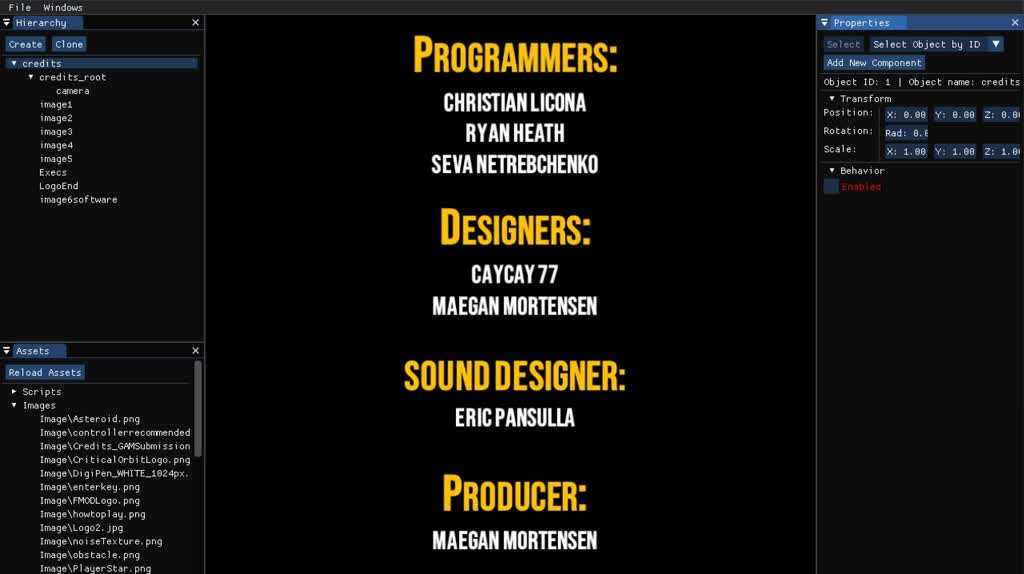
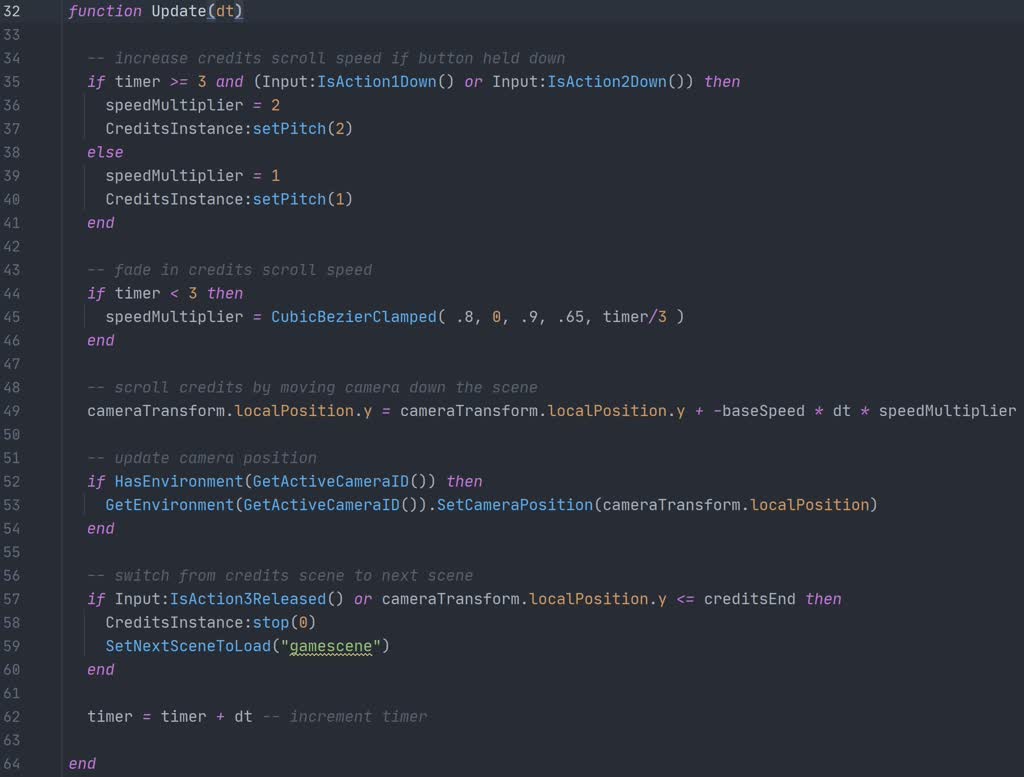
This simple but powerful setup allows us to quickly generate content for our game. For example, our credits scene is a simple scene setup with the editor and a Lua script.
The contents of the credits scene are a sequence of sprites laid out in the scene. A Lua script is attached to the camera which drives it to pan down the credits scene.
C++ and Lua
While the engine was written in C++, the gameplay was scripted with Lua. We wanted to make sure that anyone on the team could create content for the game without having to know the inner workings of our C++ code. An API was created to bridge the gap between our engine and Lua code.
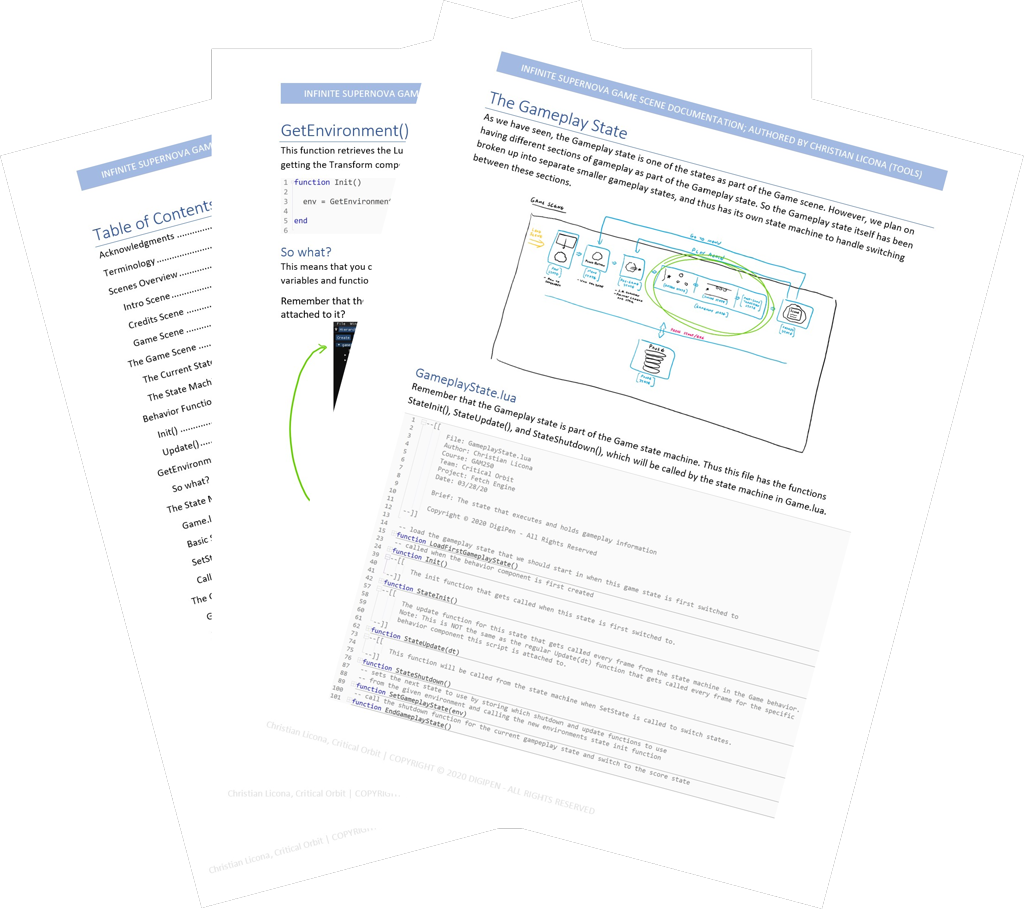
To make the process of writing Lua scripts for our game even easier, I created this technical document outlining the scripting structure of our game and important functions to be aware of when interfacing with our engine.
Starfield Shader
Another fun thing I worked on for this project was the starfield background for the game which is actually a shader written in GLSL. I found this excellent tutorial by The Art of Code and thought it would be perfect for our game.
In order for the shader to work for our game, I had to make some tweaks. I found a cool program called SHADEred that allowed me to view and tweak values in real-time as I developed the shader.
Once I was happy with the tweaks and values that I had exposed, I added the shader to our engine which now had the capability of changing the behavior of the shader within the editor and during gameplay.
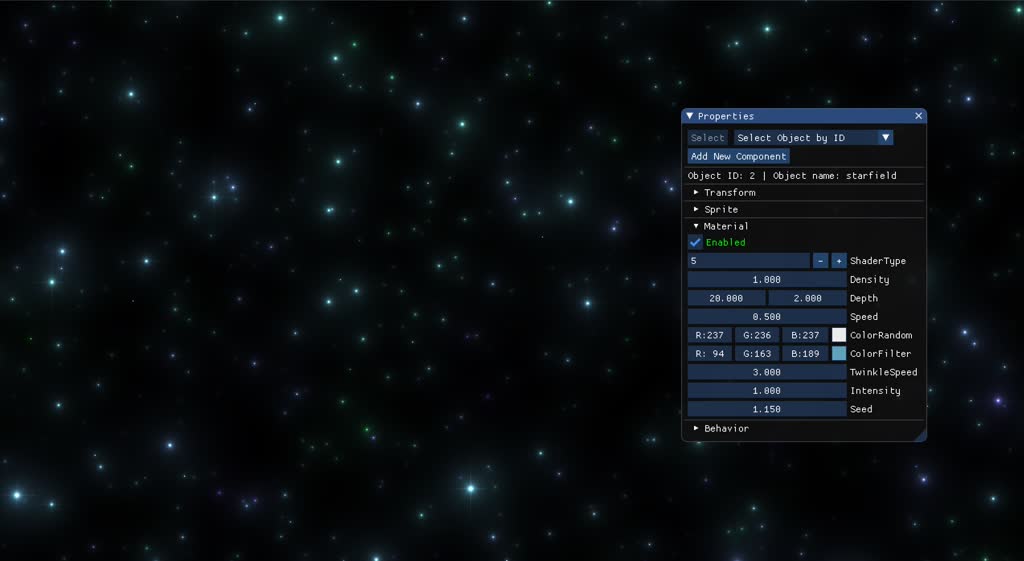
The starfield shader can be modified from the Material component. All of these values are exposed to Lua scripts so things like the intensity of the stars can pulse with the music.
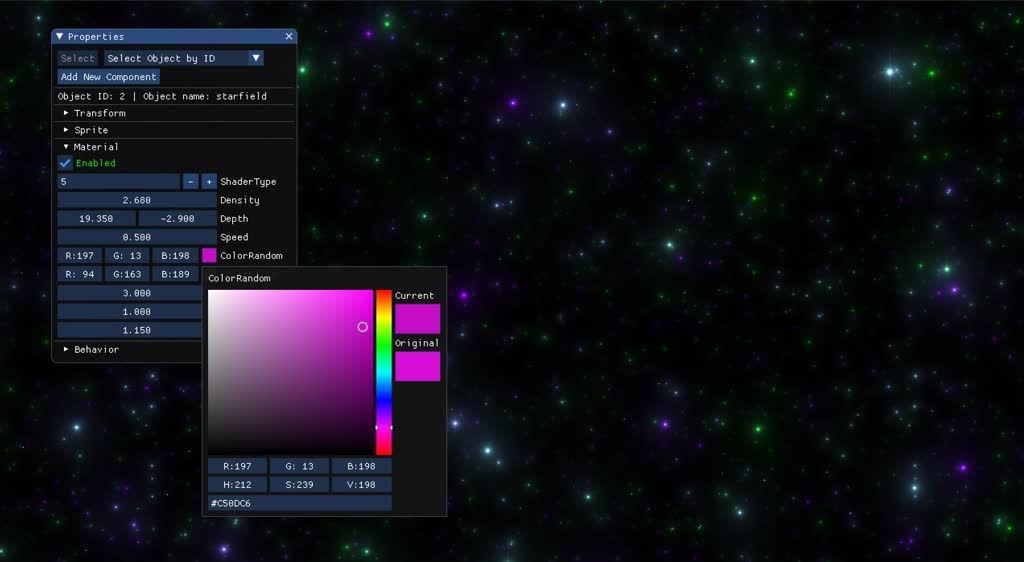
The Density and Depth control how many stars are visible and how far away they are from each other. Color randomness can be tweaked to change the vibe of the scene.
Because of the way the shader functions, having such a saturated starfield requires more computation and thus more processing power to render to the screen. Luckily we don’t need this many stars, although it is pretty to look at.
More Projects⮕

